Well, we get started with configuring LACP, let’s talk a bit about few networking terms.
- Link Aggregation Group (LAG): The simplest definition of LAG is bonding two network interfaces in order to achieve greater throughput.
- Link Aggregation Control Protocol (LACP): This is a protocol for the collective handling of multiple physical ports that can be seen as a single channel for network traffic purposes.
LAG/LACP in vSphere 6.5
LACP support has been available since vSphere 5.1. LACP allows you to aggregate the bandwidth of multiple physical NICs on a host, a LAG can only be created on a virtual distributed switch. When you create a LAG, it should be the only Active uplink for that portgroup.
A LAG can be created with two or more ports. Network traffic between these ports is load balanced via the LACP hashing algorithm. When a LAG is created on the vDS, it creates a LAG object on every ESXi host that is connected with that vDS.
Design considerations for Port Channel Configuration on the Physical Switch
- The number of ports in the LACP port channel must be equal to the number of physical NICs that will be grouped on the host.
- The hashing algorithm of the LACP port channel on the physical switch must match what is configured on the vDS LAG.
- All physical NICs that are connected to the LACP port channel must be configured with the same speed and duplex settings.
LACP limitations on a vDS
- LACP is not supported/compatible with software iSCSI multipathing.
- LACP support settings are not available in Host Profiles.
- LACP support is not possible between nested ESXi hosts.
- LACP support does not work with port mirroring.
- Team and failover health check does not work for LAG ports.
Does LAG really provide Load Balancing?
The answer to this question is NO. A LAG does “Load Distribution” and there is a significant difference. LAGs use a load distribution where the algorithmically assign sessions of a given uplink is based on a hash value that the algorithm, and then distributes the sessions as evenly as possible.
Configuring a LAG in vSphere 6.5
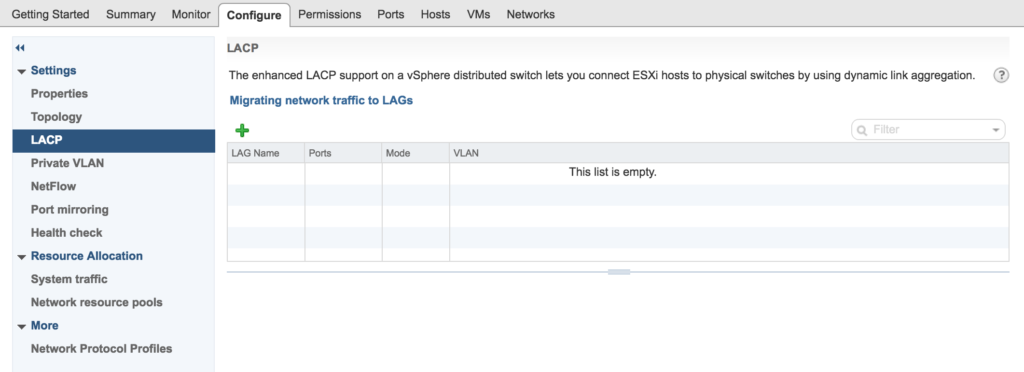
Log in to vSphere Web Client and navigate to the Networking view. Select the vDS > Configure > LACP option and click on green + button to add a lag group.
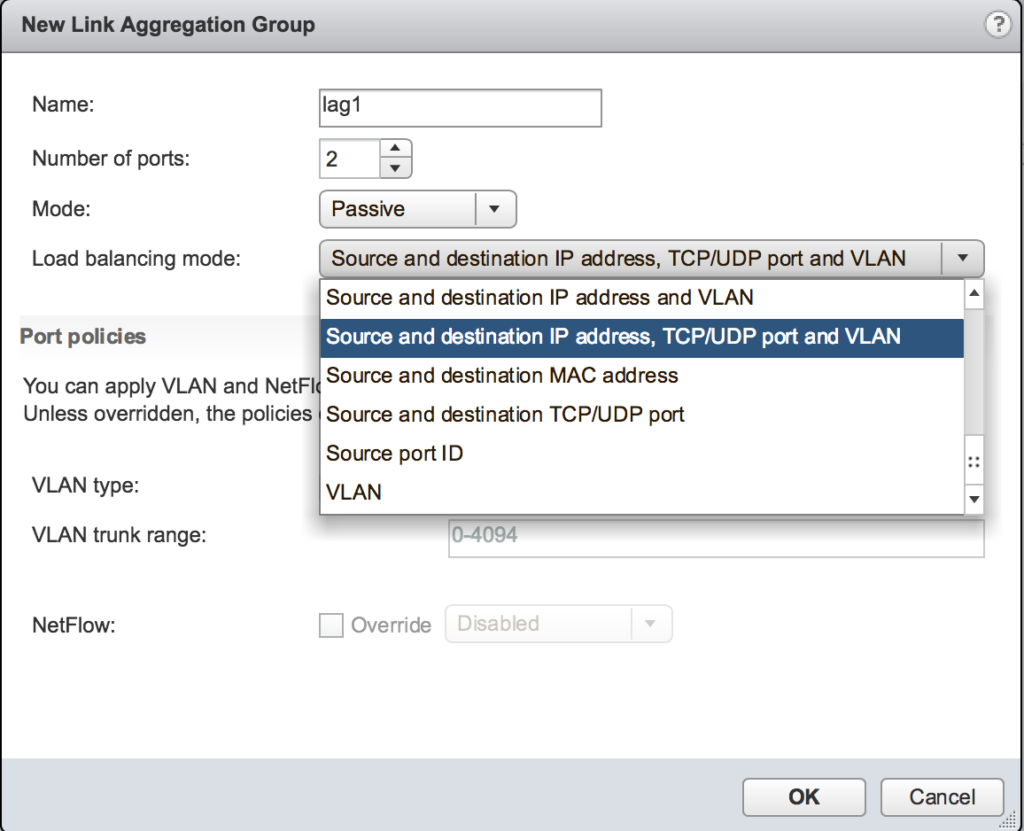
Provide a name for the lag group and then select the number of ports that will participate in this lag. The number of ports should be equal to the number of physical links that will be added to the port channel.
There are 2 modes available for lag configuration, active and passive.
An active device will actively seek out a peer device to form a LAG, while a passive device will only listen for requests. At least one of the two devices must be active, or else both will only listen. I have selected the default option here.
Select any of the load balancing modes as per requirements of your environment.
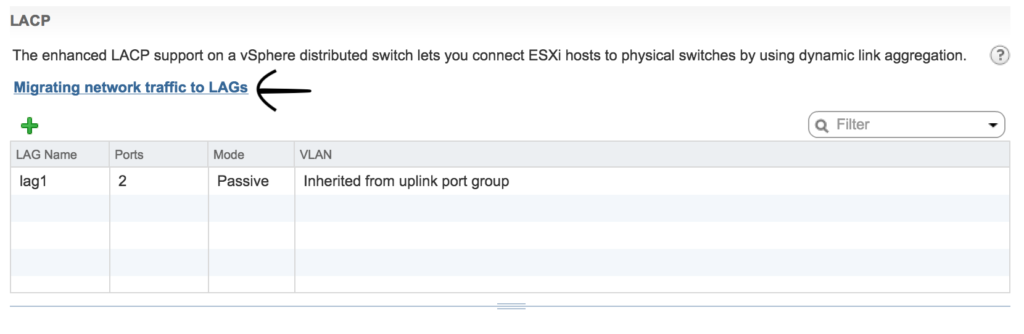
Once the lag is created, click on Migrating network traffic to LAGs.
It will open a 3 step wizard which shows the workflow for successfully configuring LACP.
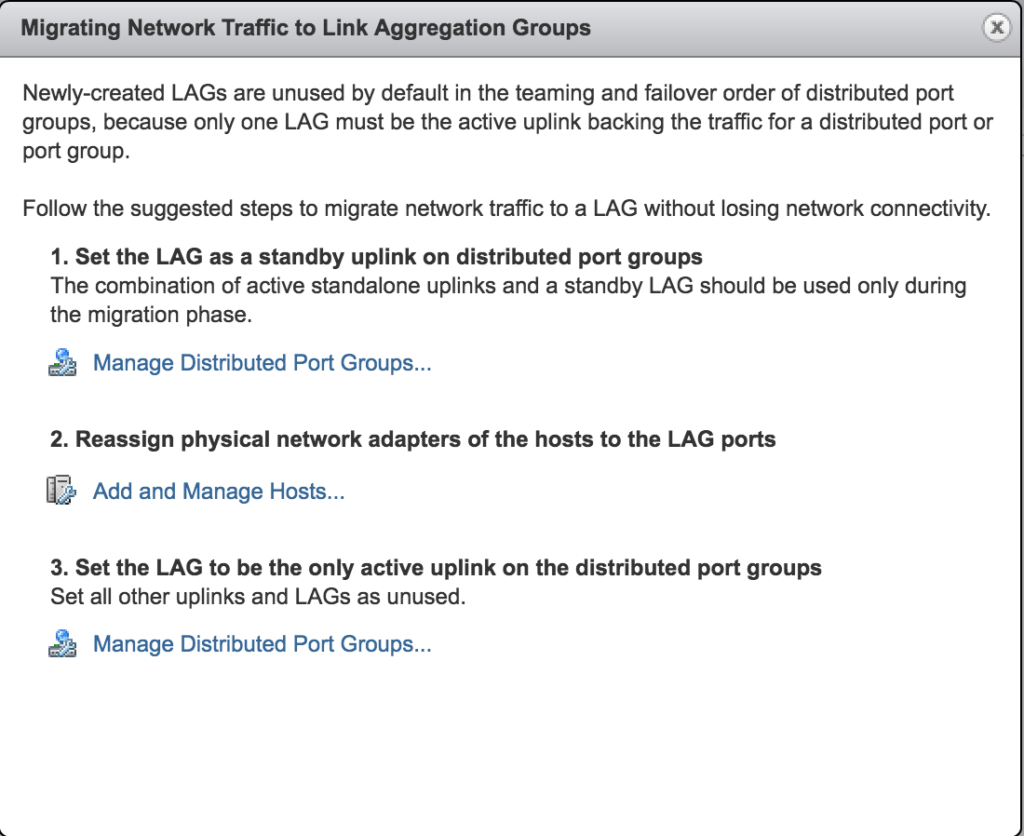
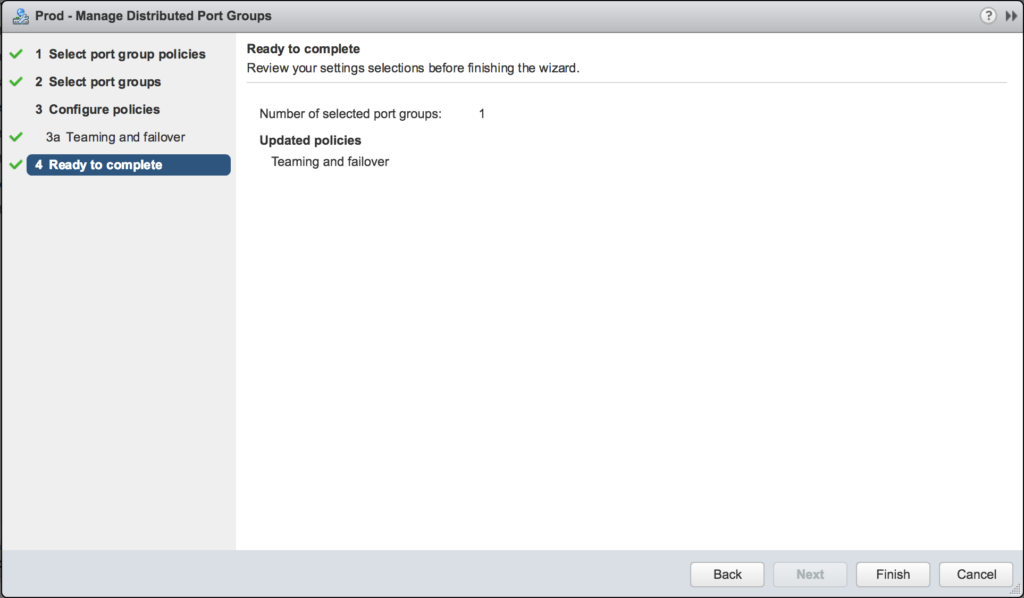
Click on Manage Distributed Port Groups and from the newly opened wizard select Teaming and failover.
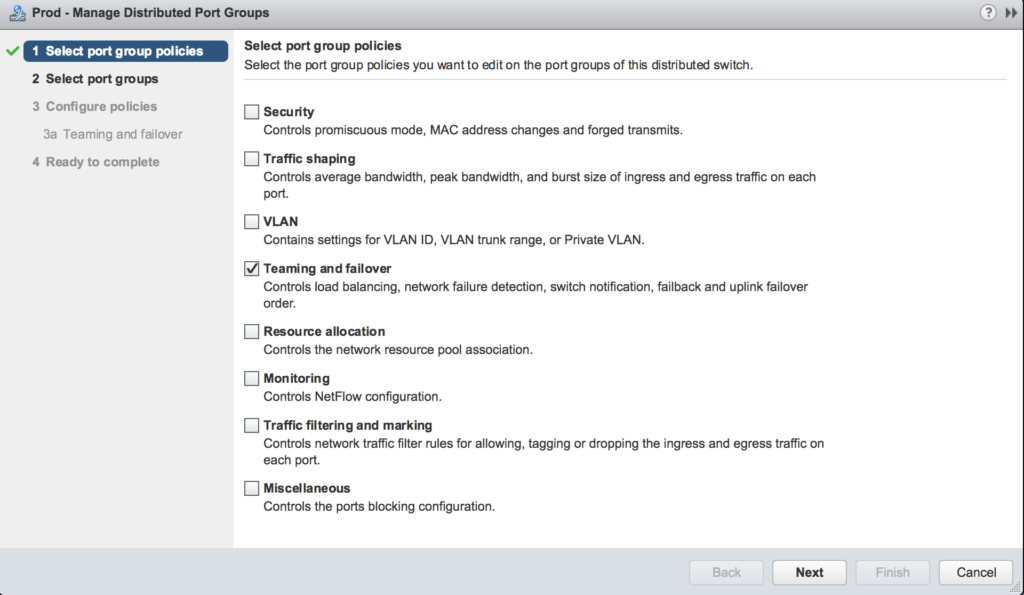
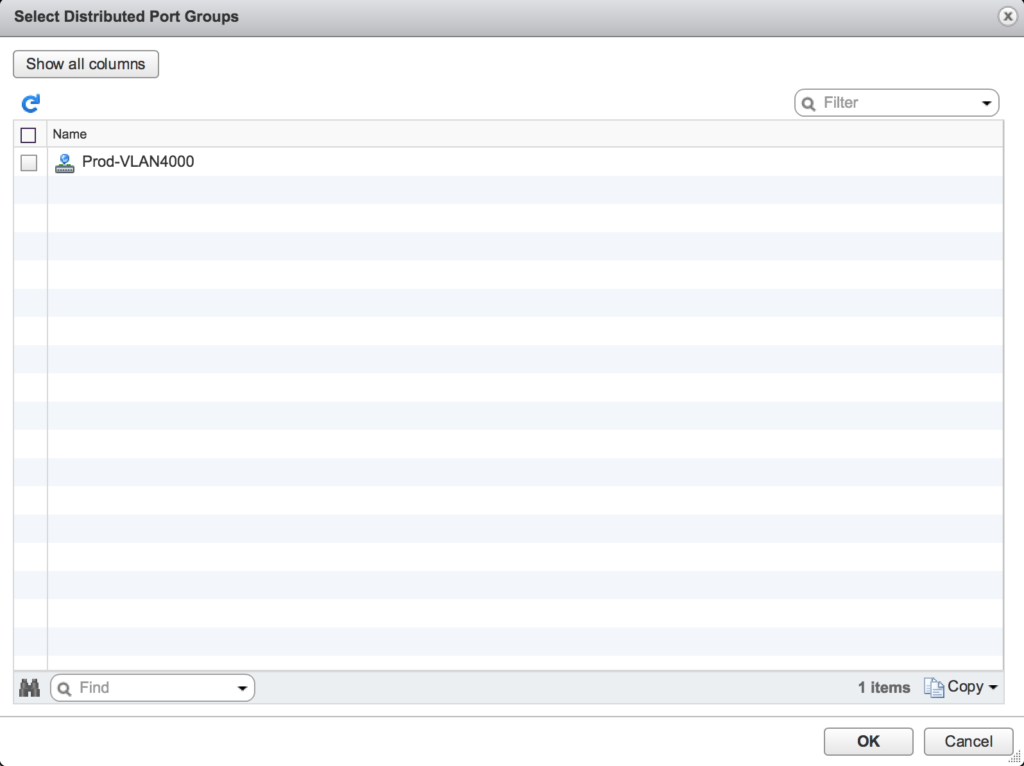
Select the portgroup from list
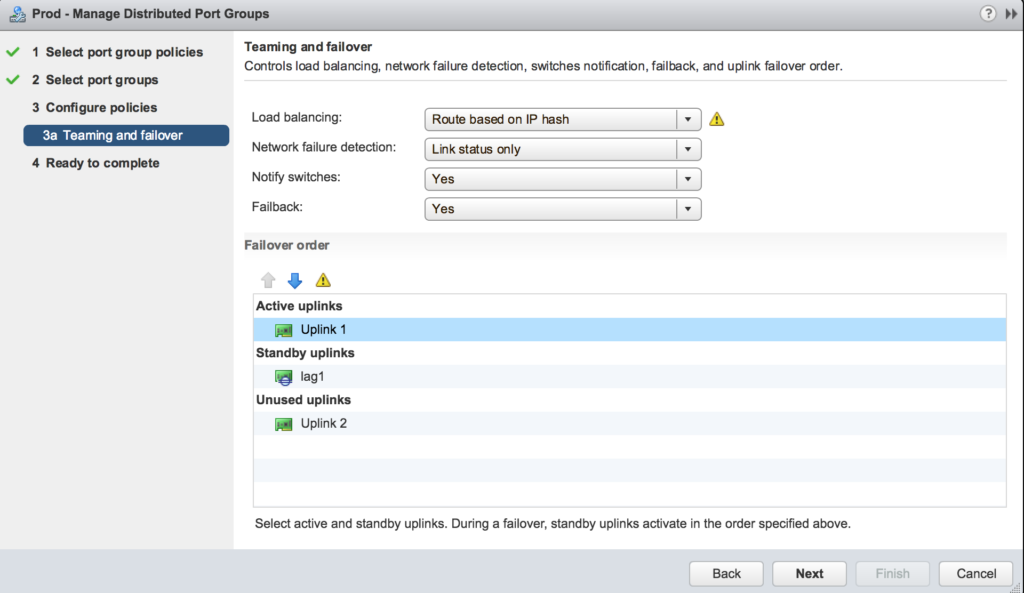
Make sure a single standalone uplink is Active and the newly created lag is in the standby uplinks. This failover order will only be used during the migration of networking. After the migration is finished we will make the LAG uplink the only Active uplink for this selected port group.
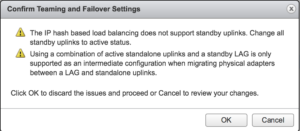
Click yes on the warning presented.
Review and hit finish.
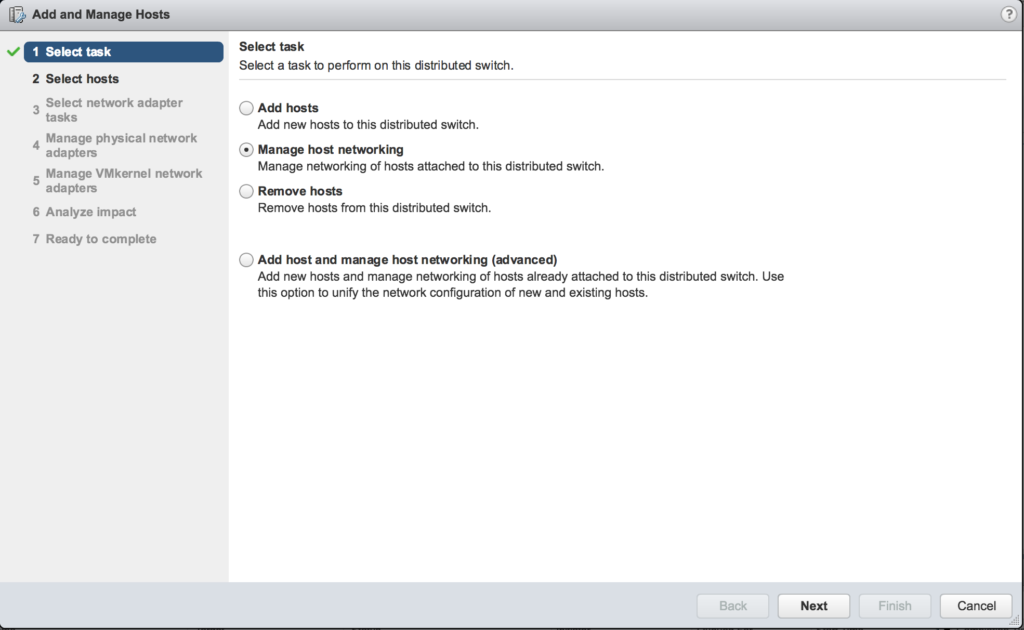
Click on Add and Manage Hosts.
Select Manage host networking and click next.
Attach the ESXi hosts

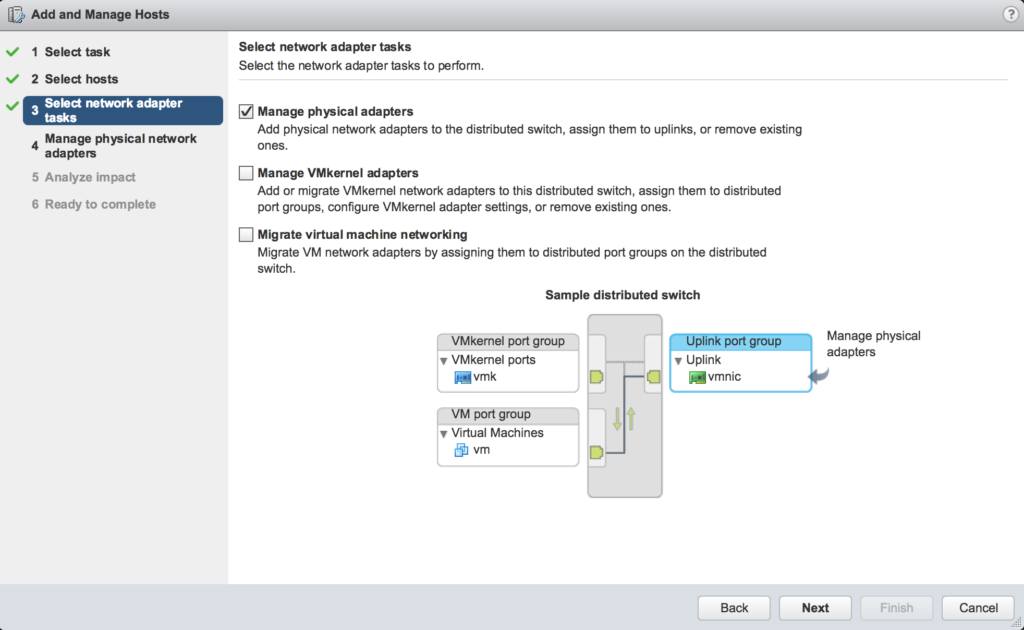
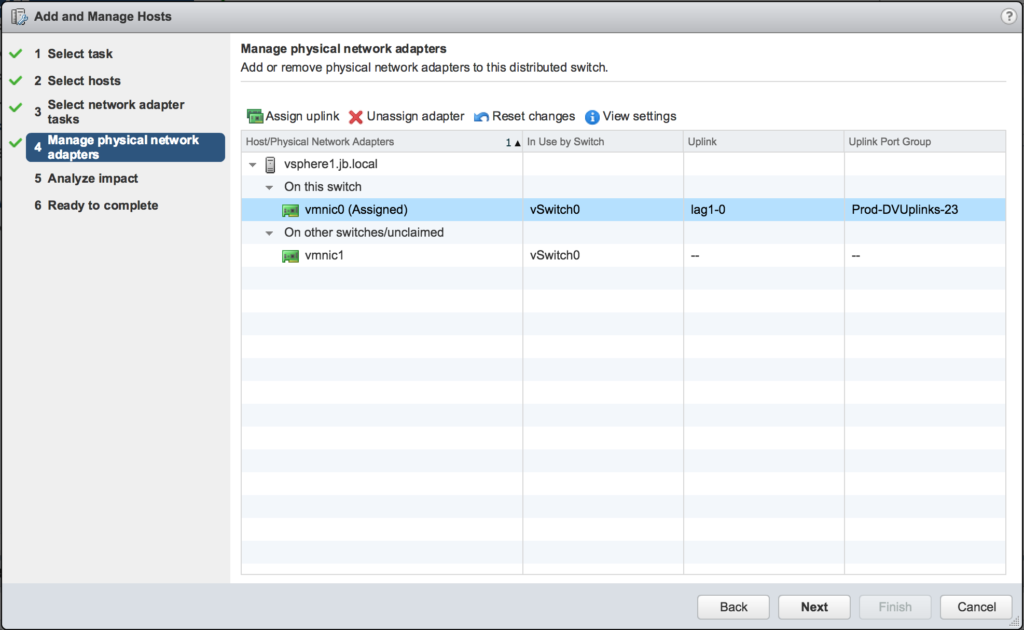
Select manage physical adapters and hit Next.
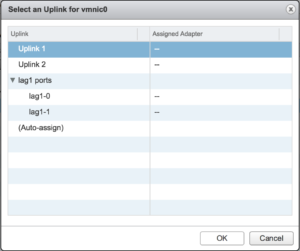
Select the physical link and click on Assign uplinks.
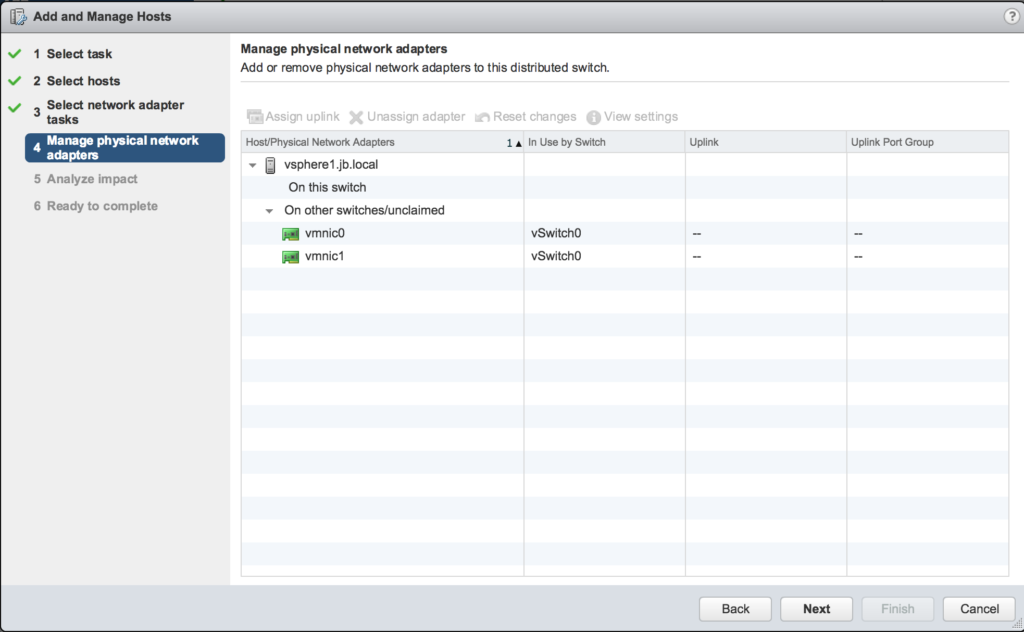
You will see two lag objects in the list.
Select the desired lag object.
Repeat this step for all ESXi hosts.
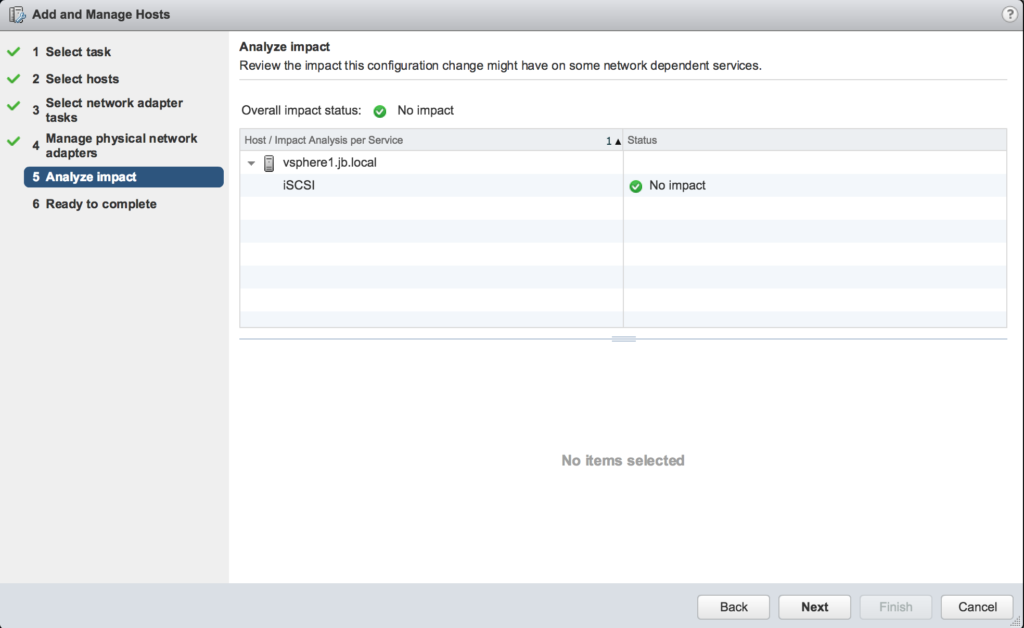
Make sure Analyze impact page reads “No Impact”.
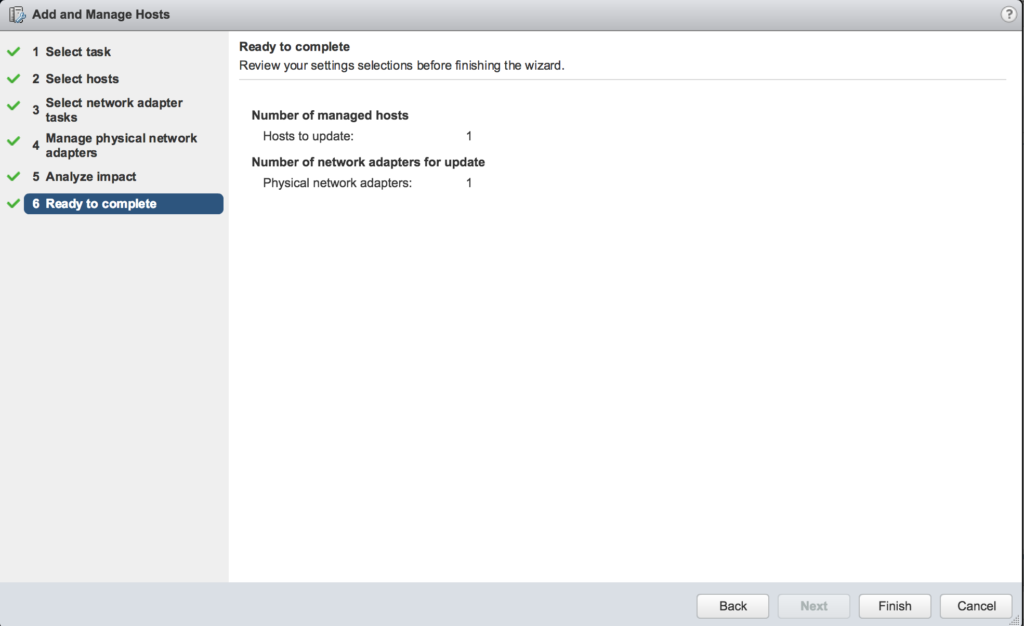
Review and click finish.
You will be returned back to migration wizard.
Click on Manage Distributed Port Groups
Select “Teaming and failover” and hit Next.
Select the desired port group
Now make the LAG as active uplink and the physical link as unused.
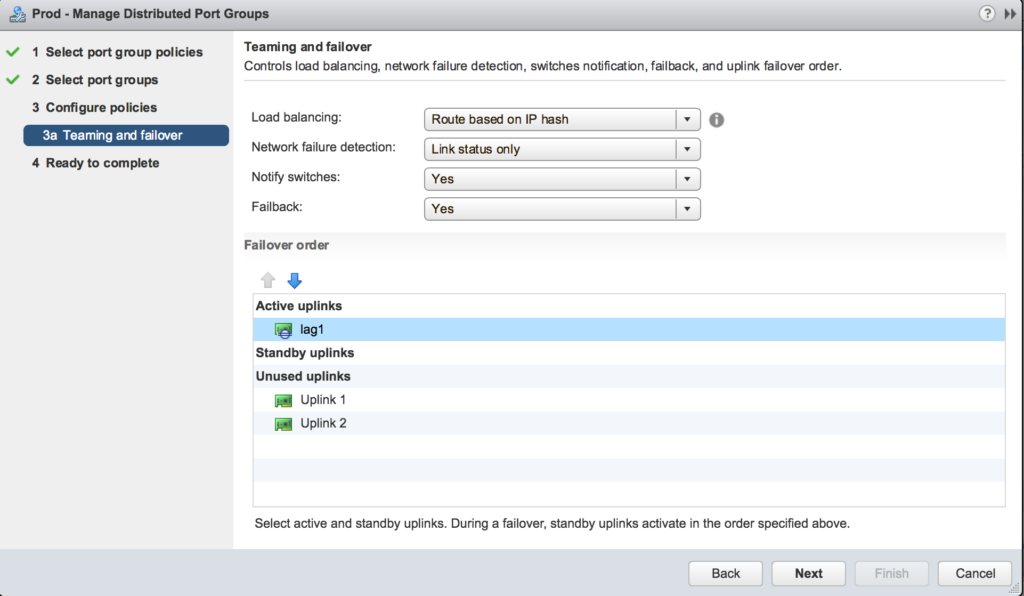
Review your settings and click Finish.
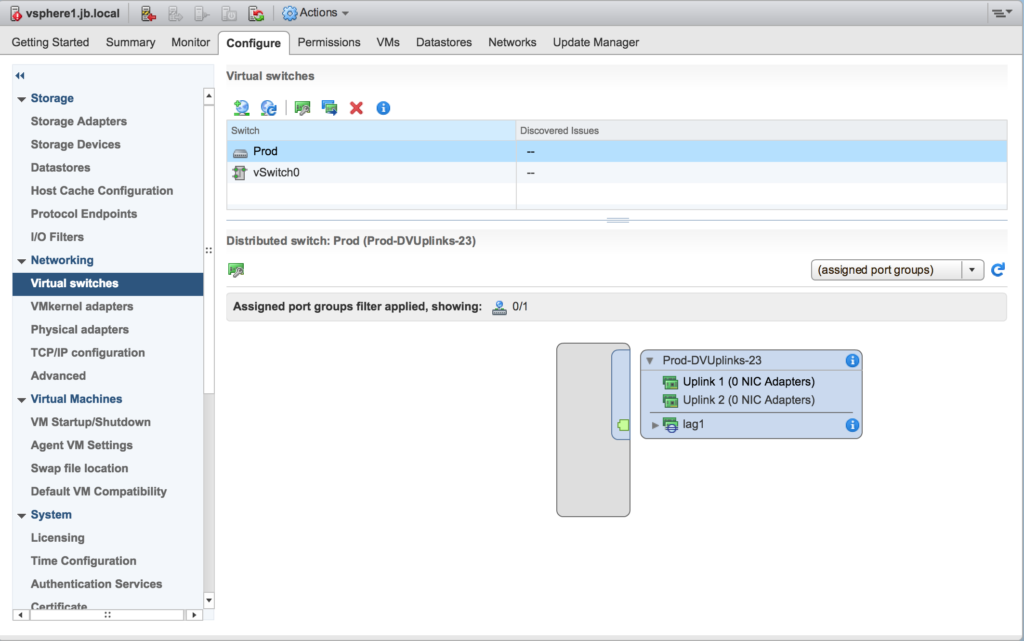
Now if you go the ESXi virtual networking, you will see that the LAG is present there.
LACP has now been configured.
Pingback: The #VMwareSummerReading List - Nicola Marco Decandia