How to migrate from Thick to Thin provisioned disks on a Nutanix cluster
I have been doing a lot of conversion over the last couple of months. This is one mistake I have come across in the field.
Below is the description of each type of provisioning.
| NAME | DESCRIPTION |
| Eager Zeroed Thick | An eager zeroed thick disk has all space allocated and wiped clean of any previous contents on the physical media at creation time. Such disks may take longer time during creation compared to other disk formats. The entire disk space is reserved and unavailable for use by other virtual machines. |
| Thick or Lazy Zeroed Thick | A thick disk has all space allocated at creation time. This space may contain stale data on the physical media. Before writing to a new block a zero has to be written, increasing the IOPS on new blocks compare to Eager disks. The entire disk space is reserved and unavailable for use by other virtual machines. |
| Thin | Space required for thin-provisioned virtual disk is allocated and zeroed on demand as the space is used. Unused space is available for use by other virtual machines. |
The following process can be done during business hours with little to no performance impact expected.
Create a new Container and enable Compression.
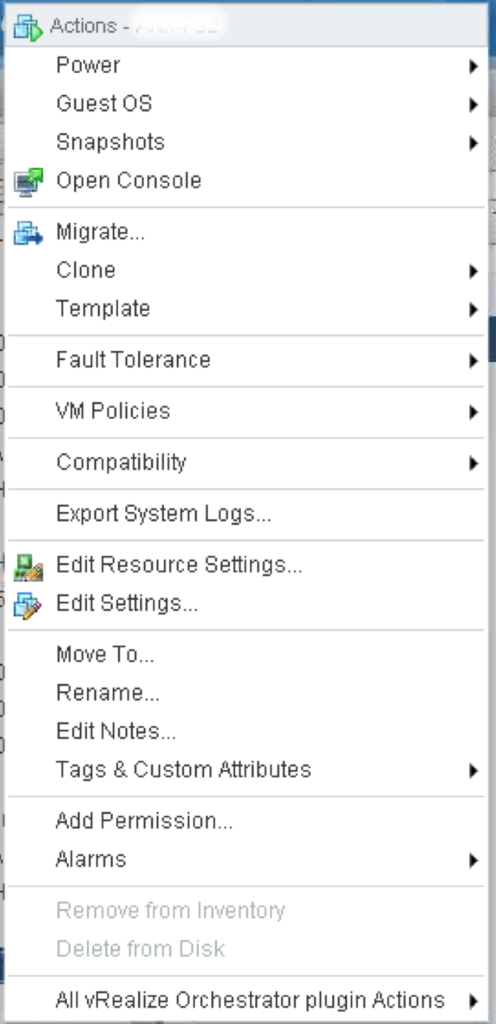
Choose the VM to be migrated. Then right click the VM.

Click on Migration

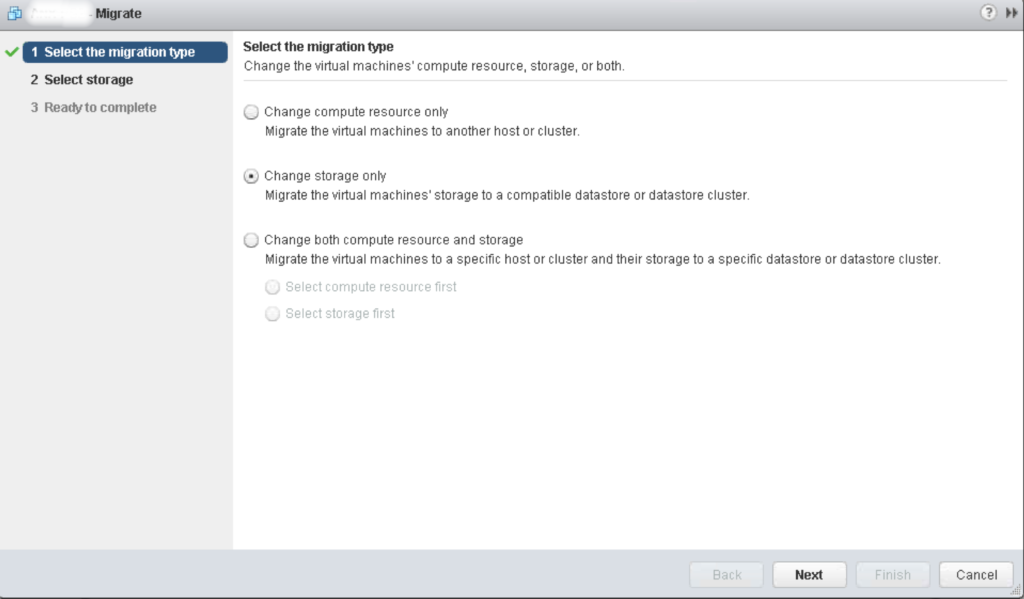
Choose Change storage only, then click NEXT

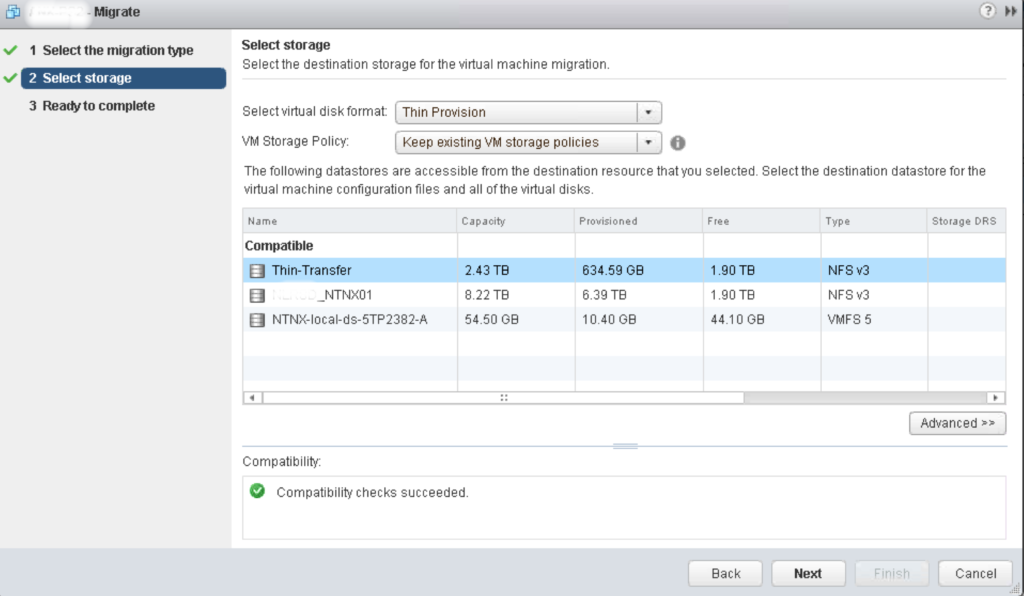
Choose the Thin-Transfer storage. Select virtual disk format, set to Thin Provision. Click NEXT

Wait for the relocation to reach 100%
Once the process has completed we need to move the VM back to the original storage.
Choose the VM to be migrated. Then right click the VM.

Click on Migration

Choose Change storage only, then click NEXT

Choose the _NTNX01 storage. Select virtual disk format to Thin Provision. Click NEXT

Wait for the relocation to reach 100%.
Once this task has been completed move on to the next machine.
This is a very simple procedure that can save you a ton of time and money.