Cybernetics Install and Network setup
We recently purchased a Cybernetics miSAN for VEEAM. It has a total space of 12TB. On disk is only 11.175TB. That is still enough room for my VEEAM backups.
Lets get started
There is a quick start guide that was shipped with the unit. Follow those instructions. 🙂
Network setup
- Power on the miSAN. Wait at least 5 minutes to allow the SAN and software to initialize
- Change the IP on you computer to something between 192.168.1.2-192.168.1.254
- Open a web browser and type this URL http://192.168.1.1
- Default username is admin, password is cyber.
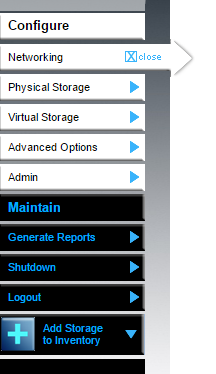
- Select Networking on the right menu
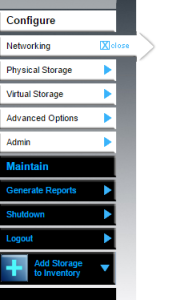
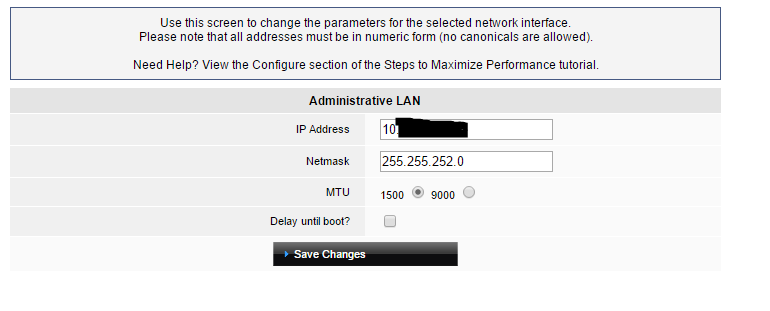
- Then select the change to the right of the Administrative LAN.
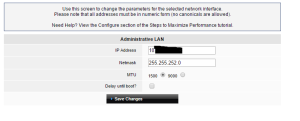
- Once you have mad that change you will need to log back into the SAN with the IP you supplied.
- Next update the Data Interfaces.
- Select 9000 MTU only if Jumbo frames are setup. ** If this has not bet setup on all devices there could be performance issues.
- In the Global Parameters change the settings that are required. Gateway, DNS, NTP
- Confirm the network settings are cable installation by logging into each interface. Set Flow Control to “On” for each host Ethernet Connection. If the switch is used to carry only iSCSI traffic, it must be a managed switch with flow control enabled. Each host/server should have only one instance of each subnet.
Once this is complete you are reading to start using your miSAN.