If you would like to turn the Cisco SG 300 into a Layer 3 switch the following are my notes on how to do just that.
Please know that if you plug this switch into a network that has DHCP running the default IP address will change from 192.168.1.254 to something else. Be ready to have an IP scanner utility such as AngryIP to search out what the IP address was changed to; or log into the system/device that is providing DHCP services and look it up.
Step 1 – Log into the CISCO SG 300-20 switch
You should be connected via the console cable using either HyperTerminal or Putty. The default username and password for the switch is “cisco” when you first log in you’ll be prompted to change the password. When you convert the switch over to Layer 3 this password change will be lost so be ready to set it again.
Step 2 -Menu
Once logged into the switch you will want to type “menu” at the prompt.

Snap shop of Menu command
Step 3 – Scroll to “System Mode”
Now arrow down to the option “System Mode.”
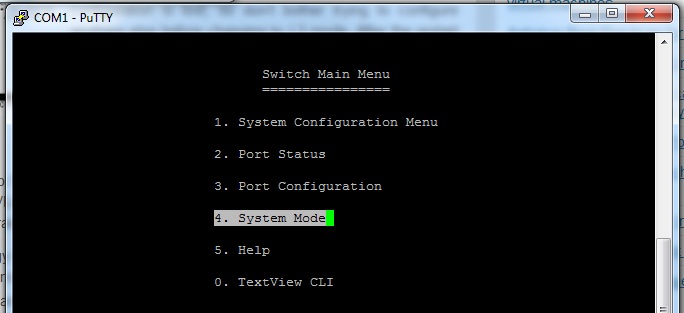
Step three shapshot
Step 4 – Select Edit
Arrow over to “Edit.”

Selection for Step 4
Step 5 – Use the Space Bar to toggle to “Layer 3.” Press Esc when finished
Using the space bar (tap once) and you should now see “Layer 2″ turn to “Layer 3.” Press the ESC button when finished.

How to change to Layer 3
Step 6 – Arrow over to “Save” and press enter. You will now reboot and any setting changes you’ve made will be erased.
Arrow over to “Save” and press ENTER. You will now be prompted with a Y/N question. Answer as you see fit, knowing when you answer yes to resetting all of your settings will be lost.
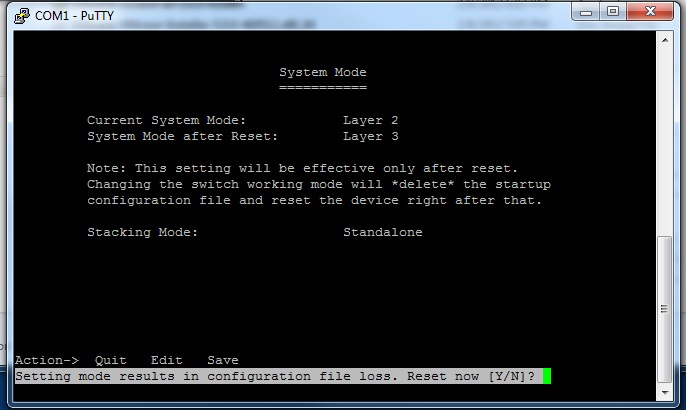
Step six
This article was taken from IT-Erate. Here is the URL http://it-erate.com/turn-cisco-sg-30020-layer-3-switch/